Week 12, Presentation

. .
Week 12

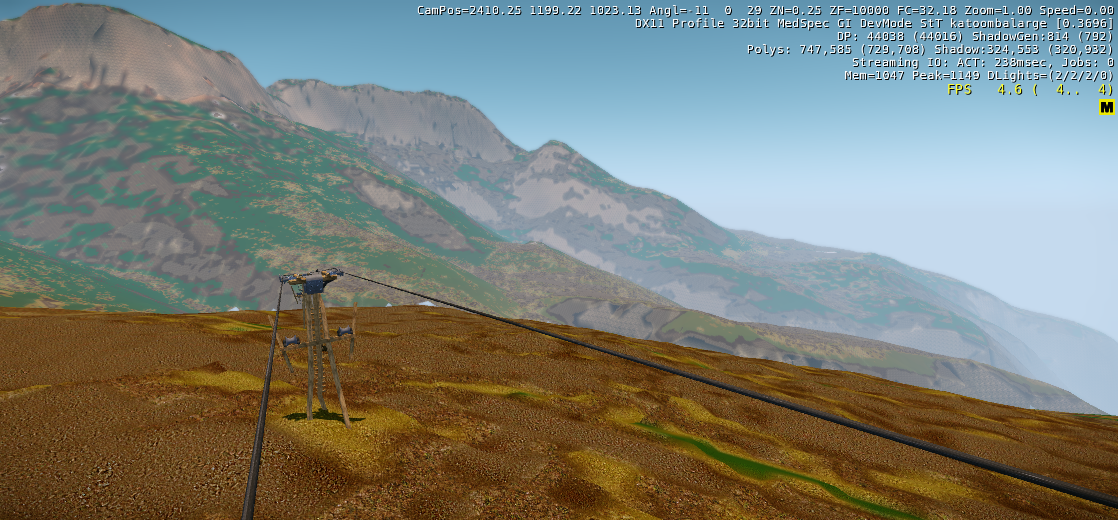
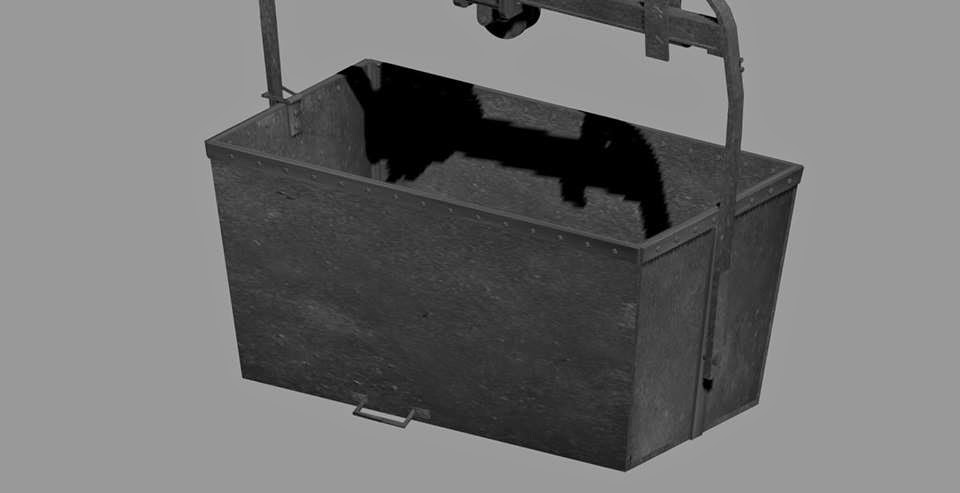
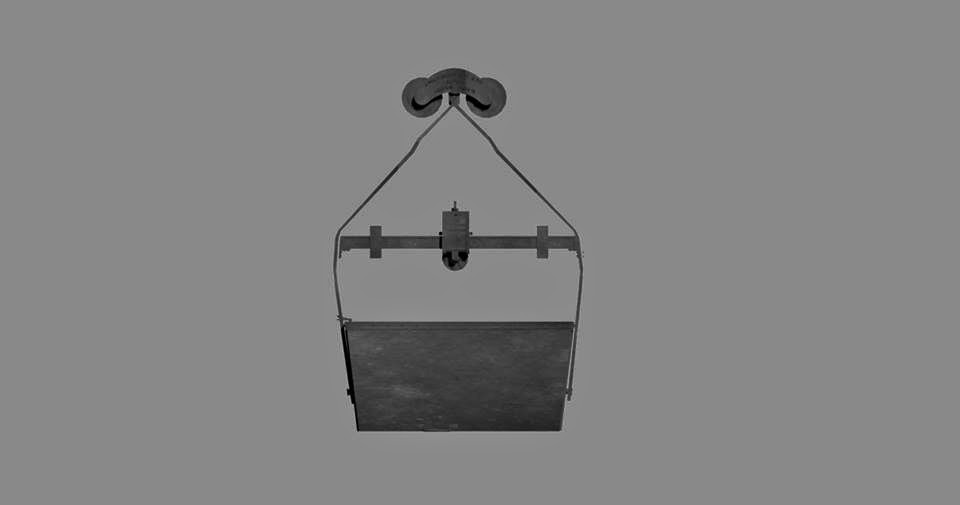
During week 12, I was responsible for the compiling of a final power point presentation which is an overview of our entire project from earl briefing stages, to progress and final completion. I also worked with Maria in editing and updating content for out. I designed, collected content, wrote content and compiled for the entire final presentation (ppt/pdf). This largely involved collecting and editing screenshots. I believe this was an important part of the project as it will act as our key method of visual communication when presenting the final project outcomes to our clients.

Link to PDF (dropbox dowload):
https://www.dropbox.com/s/quca97qmkc3ydc3/ARCH1391_Final_Presentation.pdf


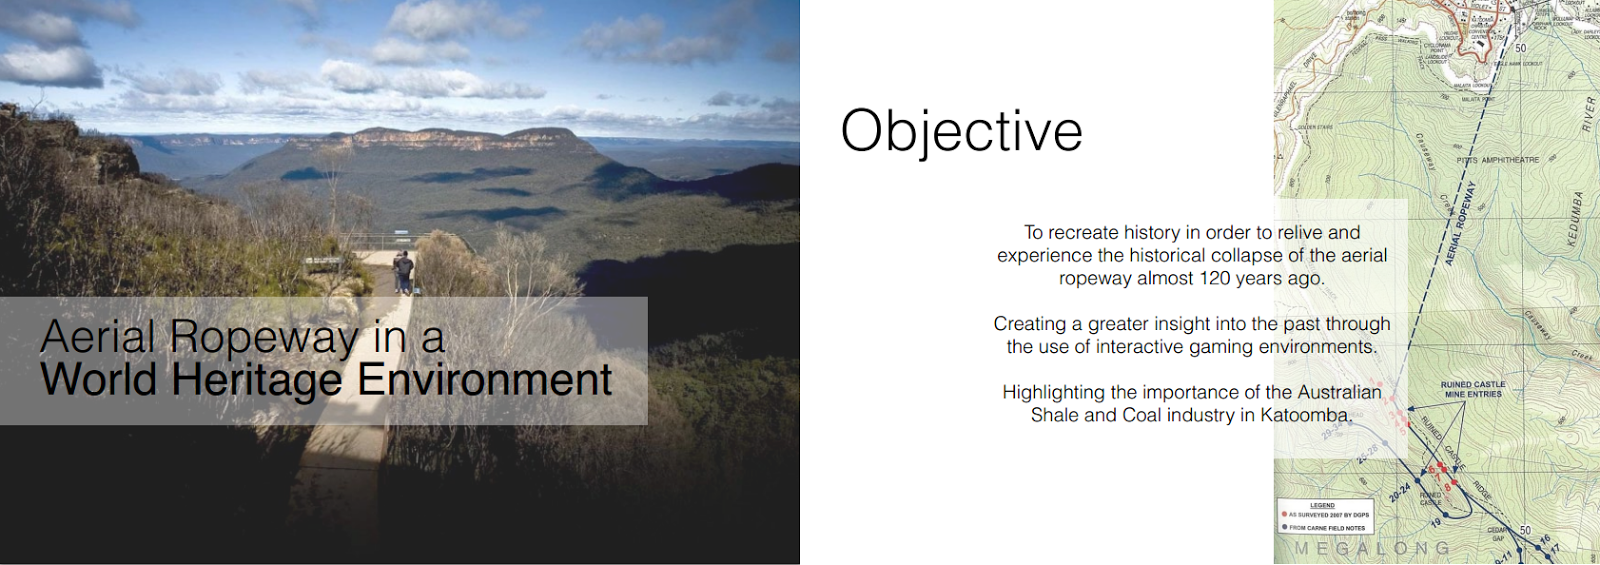
Presentation Slides:

Week 11, Object Placement

. .
Week 11

In week 11, I assisted Matt in the creation of Level 1 and 2 by helping with terrain painting and object placement. Matt had already placed the towers however the shale buckets needed to be placed along the ropeway. As the bucket was a separate 3D model each bucket needed to be placed and the rotation adjusted individually which was very time consuming.


Week 11, Feedback: Remuneration

. .
Reflecting on Collaboration: Remuneration


Presentation by Josh and Anders


Presentation and video were visually appealing, well illustrated and well executed however sound would have made it more pleasing to watch; showed evidence of creativity and thought by including their own invoice example; inclusion of sample project software proved that they clearly undertook wider depth of research and experimentation; the topic was explicitly linked to their project and to the architecture industry which made it extremely relevant to the audience and our position as soon-to-be graduates in the architecture field; the inclusion of actual local and accurate industry data gave a realistic insight; contracts section was a bit brief and they could of included a bit more info here; overall flowed nicely however there was a slight lack of cohesion verbally as it sometimes was a bit messy and seemed as if they were cutting one another off, but this only occurred on the rare occasion; I thought their presentation was quite well-done.

Week 10, Animations

. .
Week 10

In week 10, I researched the process of exporting animations from 3Ds Max to CryEngine3. I sourced a number of tutorials and ran some tests which I then compacted into a brief step-by-step list of what to do for importing animations in order to help the rest of my group when it came time to export/import animations for their 3D models later in the project.


Exporting Animation from 3DS Max to CryEngine


In 3DS Max:

> In the Motion Tab, Assign TCB controllers to the Position and Rotation parameters of any objects in 3ds Max
> Make Animation
> In CryEngine3 exporter add and select object change Export To from .cgf to .cga
> Export Nodes
> Put exported .cga file in cryengine folder


In CryEngine3:

> Rollup Bar > Objects > Entity > Physics > AnimObject
> In Entity Properties, Change model for AnimObject (default will be a sphere) to the exported .cga file
> Assign material to AnimObject
> In Entity Property under Animation tab, select (tick) Playing and Physicalise, ect


Video:
Skip to 10:00

CryEngine Documentation:

Week 10, Feedback: Conflict

. .
Reflecting on Collaboration: Conflict

Presentation by Shaun, Paul, Roschelle, Ella, Eugelyn and Reina

Some presentation slides were a bit too text heavy; most of the group members just read directly from the slides too which meant it was totally uneccessary to have so much text in the slides; there was extensive theory on conflict and background to the topic which was helpful in allowing the audience to guage a thorough understanding of the extent of conflict and what it can mean for group work; the video was very entertaining and linked the topic to realistic situations which may actually be relevant at some stage throughout everyones project; the video was the highlight of the presentation and showed a lot of thought and creativity; well done.

Week 9, 3D Modelling

. .
Week 9

During week 9, I made some slight revisions to the 3D model of the shale bucket in response to feedback from the clients. The changes included an extra bend along the long bucket handle and a claw handle which holds the handle in place where it meets the bucket. I also added some detail (bolts, etc) to the existing models of the north and south terminals.


Week 9, Individual Milestone

. .
The Project
The project Aerial Ropeway in a World Heritage Environment is based on a coal and shale mining system in Katoomba, NSW which collapsed over 120 years ago and has now become part of a World Heritage site. My team is required to recreate the environment using Cry Engine 3 and 3D Studio Max demonstrating the aerial ropeway system in operation.

Group Blog:

Individual Contribution
My role throughout the initial period of the project has been based around 3D Modelling, Texturing and Import/Export using 3D Studio Max and CryEngine3 as the main software platforms. My contribution to the project has also consisted of extensive research and planning. The tasks I have played a role in have been outlined and categorised in the timeline below:

Back Brief
In week 2 we collaboratively developed a back brief to help us understand the project and identify our preliminary objectives and distinguish each team members roles.

Group Collaboration Presentation: Planning
Our group collaboration presentation topic was planning. I wrote the content (focusing on planning theory)for the PowerPoint component of the presentation and also assisted in the graphic design and collaboration of our final PowerPoint presentation. I also designed and produced Gantt Charts outlining our intended project timeline.
Links to Blog Posts:

3D Modelling
I was assigned the task of modelling the shale bucket. This is the main component of the aerial ropeway system. Initially the modelling needed to be completed using reference images with no actual dimensions due to a delay in the site visit. Following the Week 4 site visit I was able to ensure precise scaling.


Links to Blog Posts:

Texturing
Texturing involved sourcing texture images, using Photoshop to modify the image to be accurate to reference images collected at the site visit, creating bump normal and specular maps using Photoshop and CrazyBump and then creating a Multi/Sub Object material in 3D Studio Max.

Links to Blog Posts:

Export/Import
I also carried out text exports and imports to ensure textures and geometry would export from 3D Studio Max and import into CryEngine3 successfully.

Link to Blog Posts:
http://bethanymcmahon1392.blogspot.com.au/2014/04/week-8-texturing.html


Interactivity/Movement
From now I will be focusing on implementing movement and interactivity in the game engine. I have researched and identified two methods of movement 1) using flowgraphs in CryEngine3 or 2) adding animations in 3ds max and exporting the objects with correlating animation files so they move in the game engine.

Tutorials:
http://docs.cryengine.com/display/SDKDOC3/Exporting+Animations
http://blackmotorcycles.wikispaces.com/Research%3B+3dsMAX+animation+to+CryENGINE3
https://www.youtube.com/watch?v=QZ-uA18uc5c

Week 8, Feedback: Intellectual Property

. .
Reflecting on Collaboration: Intellectual Property

#1 Presentation by Alyssa and Vedran

Video was visually appealing, some dialogue to compliment the video would have been beneficial; some parts of slide show were really text heavy and therefore difficult and too lengthy to read; the background/theory content was informative; although they did begin to link the topic this was very brief and lacked any substantial details; a more detailed/explicit link between IP and their project would of made for a better presentation.


#2 Presentation by Dorothy, Ricky, Alan, Maki, Stefan, and David

Animation was visually appealing and was cute and funny, this use of humour caught the audiences attention well; presentation was extremely detailed and informative and covered all aspects of IP; the inclusion of information on how to actually obtain IP protection was a good inclusion; they clearly described how IP is relevant to their project through the use of explicit and real world examples which the audience can relate to; they also linked IP to our industry and degree which was extremely relevant and interesting for the audience; good job.

Week 8, Texturing & Exports

. .

Texturing

This week I merged Iqra's model of the transport related components of the shale bucket with my model of the body of the shale bucket. I modified the colouring of one of the textures I had previously sourced to more accurately affect the photographs of the shale bucket as taken on the site visit. The material is intended to look like a powder coated black metal/steel.

In 3DS Max I created a Multi/Sub Object material in the material editor which had 2 sub-materials (as the whole object is the same texture, I only need one sub-mat for the actual texture and a second sub-mat for a physics proxy which will hopefully add a collision to the object in the game engine (as mentioned in my earlier texturing post from Week 7). I saved all of my texture images as .tif files using the Photoship Crytiff plugin, I then also simply copied these into a test CryEngine3 directory which automatically generated matching .dds files. According to a tutorial I found last week on texturing the .dds files are the best to use when texturing an object for use in CryEngine. I applied each map (diffuse e.g. basic texture map, normal bump and specular) using the corresponding .dds files to the map slots in 3DS Max for the first sub-material, and applied a NoDraw physicalize proxy to the second sub-mat. I am not 100% satisfied with the appearance of the finished material as of yet, so it may be modified in the future.

 I created a texture for the shale bucket which is intended to look like powder coated black metal, I then completed further test exports from 3D Studio Max to CryEngine3. I had some technical problems in exporting the 3D Studio Max material to CryEngine3, with max constantly crashing during the export process, also the material is currently not physical (e.g. the player can walk through it in CryEngine3), which I need to fix. I have created a material in CryEngine3 as a place holder, although I am not 100% happy with it's appearance as of yet, so it may be modified in the future.

I also carried out test exports to visualise the applied material on the bucket in CryEngine3. I had some technical difficulties in exporting the material from 3DS Max and saving it as a .mat for compatibility in CryEngine 3, and a place holder material which was created in the engine has been used instead for the screenshots pictured below.

Texture Maps:

Merged Model (without any textures):

The following screenshots depict the material applied to the object as seen in 3D Studio Max:


Test Exports in CryEngine3


Camstudio capture depicts walkthrough of texturing process + test export to CryEngine3: